You probably know the deadlift is one of the best exercises for gaining full-body strength and size.
It builds all the muscles you need to look strong—your traps, lats, forearms, abs, and thighs.
But here’s the catch: your grip can make or break your deadlift performance.
If you’ve ever felt your back and legs were ready to pull heavier but the bar slipped out of your hands, you know the frustration of grip failure.
Getting your grip right isn’t just about moving more weight. It’s also about staying safe.
When your grip starts to fail, you’re more likely to compromise your form—rounding your lower back, shooting your hips up, or shrugging the weight. These shortcuts increase your injury risk, especially when you’re handling heavier loads.
That’s why in this article, we’re going to tackle everything you need to know about deadlift grips.
You’ll learn about the five main grip styles—double overhand with and without straps, mixed grip, hook grip, and snatch grip.
You’ll also discover how to choose the best grip for your goals and techniques to strengthen your grip, minimize injury risk, and help you hold the bar longer and more securely.
Key Takeaways
- Your grip can make or break your deadlift performance—mastering the right deadlift grips helps you lift heavier and stay safe.
- A solid deadlift grip starts with gripping the bar with your fingers (not palms), squeezing as hard as possible, and pulling with efficient form on every rep.
- The five deadlift grips you need to know are the overhand grip, mixed grip, hook grip, double overhand grip with straps, and snatch grip.
- Beginners should start with a double overhand grip and progress to mixed, hook, or strapped grips as they lift heavier weights.
- To improve your deadlift grip strength, deadlift regularly, avoid straps on other exercises, do grip-specific training, and use chalk when needed.
Deadlift Grip 101
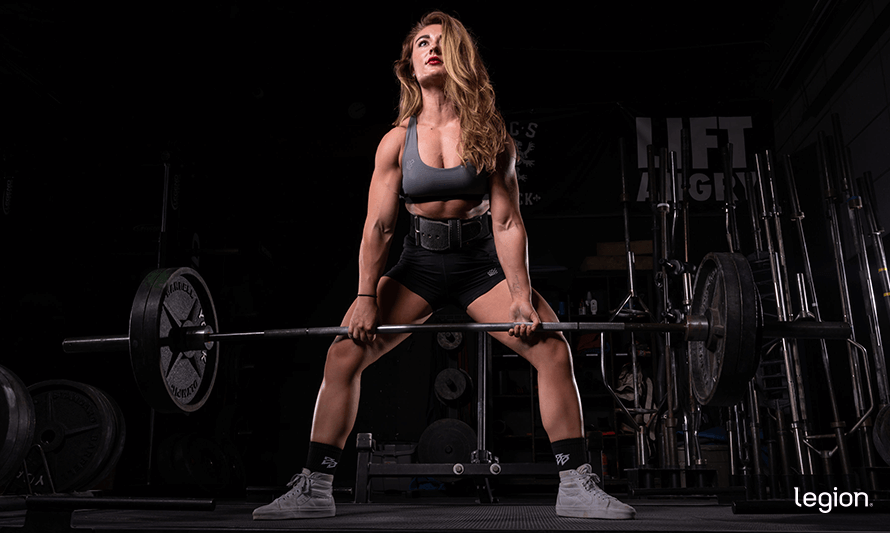
Before we talk about the different deadlift grips, let’s talk fundamentals.
Specifically, there are three simple rules for deadlift gripping that will improve your performance regardless of what style of grip you’re using:
1. Grip the bar with your fingers, not your palms.
A common deadlift grip mistake that people make is gripping it in their palms, closer to their wrist. This might feel secure when you’re getting set up, but once you start to ascend, the bar will slide into your fingers, throwing off your balance, form, and tempo.
The right way to set up your deadlift grip, then, is to start with the bar in your fingers. This way, the bar stays locked in place throughout the entire movement, allowing you to focus on the gross motor movements.
2. Squeeze the bar as hard as you can on every rep.
One of the easiest ways to increase your strength on just about any barbell exercise is to simply grip the bar like your life depends on it.
There’s a reason powerlifters think about “bending the bar in half” when bench pressing and “digging finger grooves” into it when pulling. They want their knuckles white for each and every rep because it helps prevent the bar from rolling out of their hands and increases force production.
READ MORE: How to Use Remote Voluntary Contraction to Instantly Get Stronger
3. Pull every rep with good form.
Poor form can compromise your grip by placing you at a biomechanical disadvantage and unnecessarily increasing the time that the bar must remain in your hands.
Getting this right starts with a proper deadlift setup—with your shoulders over or slightly in front of the bar and your lumbar spine (lower back) in a neutral position, allowing you to pull the bar up in a more or less straight line.
Here’s what I’m talking about:
Notice how the bar starts a couple inches in front of my shins, how my shoulders and hips align, and how the bar doesn’t waver to or fro as I pull?
That’s how you deadlift with maximum efficiency and thereby mitigate the amount of work that your grip has to do and the extent to which it can get in the way.
READ MORE: How to Deadlift with Proper Technique
The 5 Deadlift Grips That You Need to Know
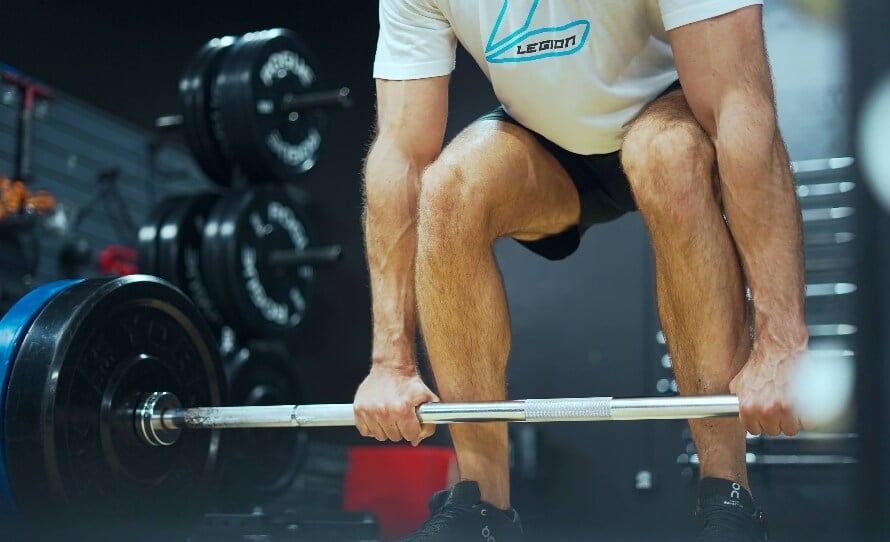

Most people think that the deadlift grip is all about raw grip strength.
If you can’t keep the bar from rolling out of your hands, they say, then you just need stronger hands and forearms.
Well, that’s certainly a limiting factor, but grip technique can also hold you back, and especially if you’re an intermediate or advanced weightlifter.
In the beginning, you don’t have the whole-body strength to give your grip more than it can handle, but once you’ve put in a year or so of hard work, the game changes.
At that point, your grip technique becomes just as important for the purposes of safety and progress as maintaining a neutral spine, coordinating your hips and shoulders, and maintaining a straight bar path.
So, with all that in mind, let’s look at the four kinds of deadlift grips that you need to know about, starting with the one you’re probably most familiar with.
Double Overhand Grip
If you walk up to a barbell, reach down, and grab it in the way that feels most natural, chances are you’ll wind up with a double overhand grip.
This is also called a “pronated grip,” and it looks like this:
As you can see, the fingers and thumbs wrapped around the bar, and the palms facing the shins.
The double overhand grip deadlift is a great starting point for people new to deadlifting because it’s comfortable and distributes weight evenly across both sides of your body, allowing you to focus on learning the more technical aspects of the movement.
There’s a problem with the double overhand grip deadlift, though: it limits the amount of weight that you can pull.
At a certain point—about 1.5 times body weight, for most—your fingers are going to start giving out, causing the bar to roll out of your hands. And when that happens, force production comes to a screeching halt and you get stuck.
This is when most people move on from the double overhand grip deadlift, either by adding straps, or switching to the mixed grip deadlift.
How to Set Up the Double Overhand Grip Deadlift
- Place your feet slightly narrower than shoulder-width, with toes pointed out.
- Position a barbell about an inch from your shins over your midfoot.
- Take a deep belly breath, and grip the bar just outside your shins with palms facing you.
- Nestle the bar as close to the bottom of your fingers and top of your palms as possible, and squeeze as hard as you can.
Mixed Grip
The mixed grip is the double overhand grip with one hand flipped over, the palm facing away from the shins. Here’s how it looks:
This is also called the “over-under grip,” and most people naturally find it most comfortable with their non-dominant hand facing their shins and their dominant hand facing away.
The biggest benefit of the mixed grip is it allows you to securely hold a lot more weight than the double overhand grip because it prevents the bar from rolling out of your hands.
For example, I myself can’t pull more than about 400 pounds for a rep or two with a double overhand grip, but can, in the next set, go as high as the 430s for 4-to-5 reps with the mixed grip deadlift.
This works because when one hand begins to flag and the bar wants to roll, it digs into the palm of the opposite hand, allowing it to remain stuck in place.
The mixed grip deadlift also has downsides, though:
- It tends to make you rotate your torso toward your palm facing you, creating a load imbalance between the left and right sides of your body.
- It places more strain on the biceps of your palm-away hand.
I don’t know of any scientific data on how this affects the safety of the exercise, but I’ll say this: while biceps tears are rare, when they do happen, it’s often the palm-away biceps during a mixed-grip deadlift.
Now, that isn’t to say that you should never use a mixed grip because you’re going to inevitably injure your biceps.
Instead, you can take a simple precaution to make the mixed grip safer: alternate your grip in individual workouts or between them.
For example, I like to deadlift with my non-dominant (left) hand facing me and my dominant hand facing away for my first set or two, and then, for my next set or two, flip it around, facing my dominant hand toward me and my non-dominant hand away.
Another option is switching your grip workout to workout, placing your dominant palm facing you in one session and then facing away in the next, or vice versa.
Either way, this is a good way to prevent overuse on one side of your body and, thus, greatly reduce the chances of developing muscle imbalances or biceps strains or tears.
How to Set Up the Mixed Grip Deadlift
- Place your feet slightly narrower than shoulder-width, with toes pointed out.
- Position a barbell about an inch from your shins over your midfoot.
- Take a deep belly breath, and grip the bar just outside your shins with your non-dominant hand facing you and your dominant hand facing away.
- Nestle the bar as close to the bottom of your fingers and top of your palms as possible, and squeeze as hard as you can.
Hook Grip
If you’ve ever seen someone deadlift a tremendous amount of weight with what looks like a double overhand grip, you’ve witnessed the hook grip.
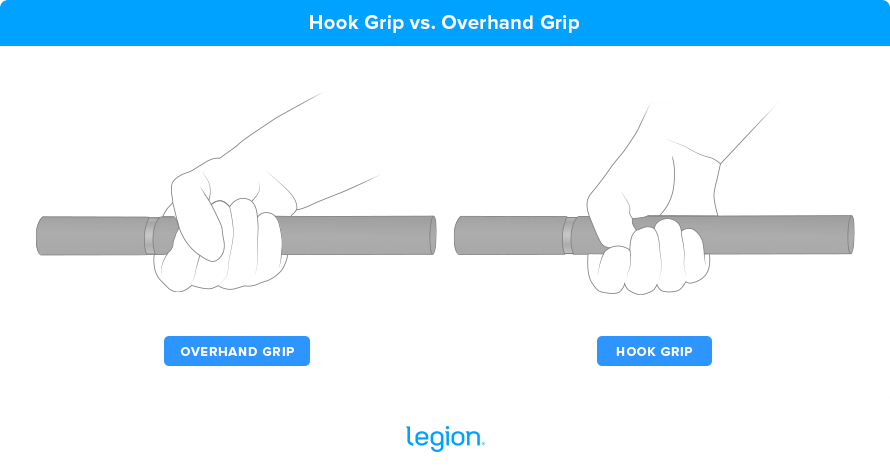
The reason you can’t tell them apart is they’re very similar, but with one crucial difference:
With the double overhand grip, your thumbs are wrapped around the bar. With the hook grip, though, your thumbs are placed sideways on the bar and your fingers are wrapped over them, like this:

This allows you to lock the bar in place and prevent any rolling, and it has gained a lot of popularity in the powerlifting space as a viable alternative to both mixed grip and strapping.
It has a major drawback, though: It hurts. A lot.
Your thumbs get absolutely crushed by the load, so much so that the first time you pull a heavy load with a hook grip, you’ll probably think you’ve inflicted permanent nerve damage.
To that point, some people say it does just that—“deadening” the nerves in your thumbs over time—but the more likely explanation is you just build a tolerance to the pain.
The hook grip also makes it almost impossible to do more than a few reps without resetting your grip because your thumb is likely to slip out of your fingers as you descend.
Furthermore, it doesn’t work well for many women and men with smaller fingers because they can’t wrap them tightly enough around their thumbs, thereby compromising its primary mechanical advantage.
All this is why the hook grip is my least-favorite deadlift grip, and why I’d rather go with the double overhand grip with straps or mixed grip.
That said, the hook grip is best suited to powerlifters who aren’t comfortable using the mixed grip, because they aren’t allowed to use straps in competitions and thus have to learn how to hit personal records without help.
How to Set Up the Hook Grip Deadlift
- Place your feet slightly narrower than shoulder-width, with toes pointed out.
- Position a barbell about an inch from your shins over your midfoot.
- Take a deep belly breath, and wrap your thumbs round the bar while slightly internally rotating your arms (turning them so that the backs of your hands face each other).
- Lock your hands in place by wrapping your fingers over your thumbs and externally rotating your arms until your palms face you again.
Double Overhand Grip with Straps
This deadlift grip is exactly what it sounds like: The double overhand grip with assistance from cloth or leather straps. Here’s how a double overhand grip deadlift looks using straps:
Straps help by keeping the bar tight against your hands, preventing roll and allowing you to maintain a solid grip.
Now, many people shy away from straps because they look at it as a form of “cheating” and making the deadlift “easier.”
Well, while I wouldn’t advise someone new to weightlifting to strap from set one on, forever, I disagree that straps don’t have a place in any serious weightlifter’s bag.
When used properly, straps allow you to safely pull more weight (making the deadlift harder on the rest of your body, I might add) without any of the downsides of the mixed and hook grips.
They shouldn’t be necessarily viewed as a crutch, either.
Yes, some people do choose to use straps instead of developing their grip strength, but that doesn’t mean that everyone should avoid straps altogether.
Once you’ve gained a respectable amount of strength in the deadlift and drilled in correct form, there’s no reason why you shouldn’t choose straps over a mixed grip if you find it more comfortable.
If your biceps are taking a mighty beating with heavy mixed grip pulling, or you just prefer how the double overhand feels, then incorporating straps into your regimen makes sense. If, however, you do just fine with alternating a mixed grip and feel no need to change anything, then don’t.
Now, the keys to successful deadlift strapping are choosing the right straps, and using them when they’re actually needed.
Let’s take a closer look at each of these points, starting with the first: the types of straps to choose from.
1. Single-Loop Straps
These are popular among Olympic lifters because they allow you to release the bar quickly, but they aren’t as comfortable or secure as other options for deadlifting.
Here’s how to use them:
2. Figure-8 Straps
Figure-8 straps are made especially for deadlifting, basically tying your hands to the bar.
This is the type of strap used in deadlift competitions, where behemoths of men do stuff like this:
Here’s how to use them properly:
The downsides to the figure 8 strap are that you can’t drop the bar and it doesn’t lend itself to other pulling exercises that can benefit from straps, like dumbbell rows.
3. Lasso Straps
This is the most popular type of weightlifting strap, and it’s also what I like most.
It consists of a single strip of cloth or leather that you can loop into a lasso shape and wrap around a bar or dumbbell, and here’s how to use it properly:
Snatch Grip
The snatch grip deadlift is a deadlift variation that uses a wide grip commonly seen in Olympic weightlifting. Using a snatch grip increases the distance the bar must travel to complete a rep, making the exercise more taxing for your legs, back, and grip.
Here’s how it looks:
You find the right width for your snatch grip by standing upright and holding a barbell at a width that places it in your hip creases when your arms are straight. Here’s an illustration to help you visualize this:
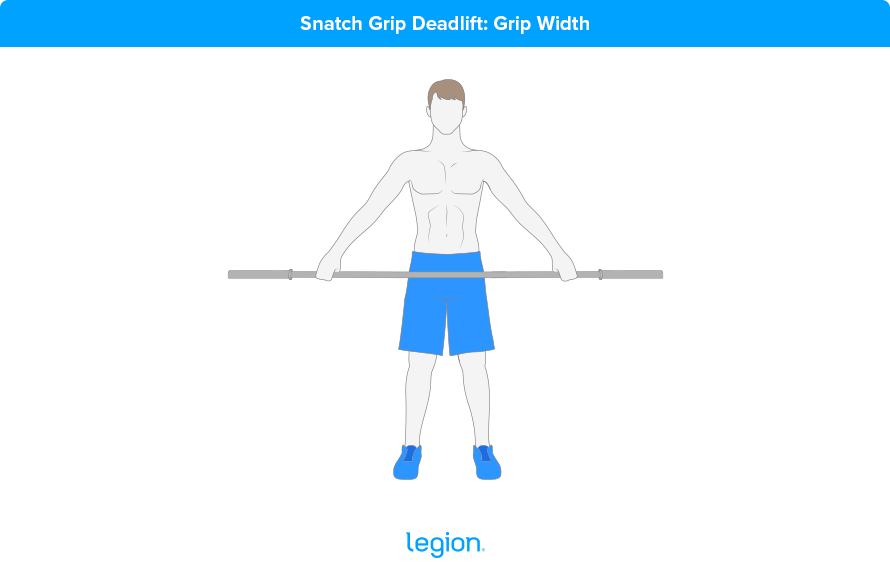

The main benefits of using a snatch grip is that it can help you overcome weaknesses in your regular deadlift.
Because the grip is wider than a regular deadlift grip, you have to bend your legs more to get into the correct starting position. And that means breaking the bar off the floor is even more challenging than usual.
By strengthening your body in this position, you generally find your conventional deadlift numbers increase when you return to regular pulling.
The wider grip also increases the load on your upper back, forearms, and lats, which makes it particularly useful for building back strength and improving grip.
That said, snatch grip deadlifting isn’t necessary for everyone. If you’re not an Olympic weightlifter, don’t have a weak upper back, or don’t struggle with the initial pull of the floor, the snatch grip deadlift probably isn’t something you need to include in your routine.
How to Do the Snatch Grip Deadlift
- Stand gripping an empty barbell at a width that places it in your hip creases while your arms are straight. Mentally note this width or use the barbell’s knurling as a reference.
- Place the bar on the floor and load it with weights.
- Place your feet slightly narrower than shoulder-width, with toes pointed out.
- Position the barbell about an inch from your shins over your midfoot.
- Take a deep belly breath, and grip the bar with a snatch grip (overhand or hook) and your palms facing you.
A Simple Plan for Developing Your Deadlift Grip

We’ve now reviewed the basics of proper gripping, the different grip styles you can choose from, and how to pick the right straps.
Let’s now look at how to incorporate it all into your training.
1. If you’re new to deadlifting, start with a double overhand grip.
And stick with it until you’re having to abort heavy sets around the 5th or 6th rep due to grip failure.
2. Once you reach this point, use a double overhand grip for all warm-up sets and an alternating mixed grip for your heaviest working sets.
If your workout program includes lighter working sets, then stick with the strapless double overhand grip as these are a good opportunity to continue building forearm and grip strength.
3. Once you’re deadlifting more than twice your bodyweight, consider using straps on at least some of your heaviest working sets.
There’s nothing wrong with using an alternating mixed grip as you progress to heavier and heavier weights, but if you’re noticing high amounts of stress on your biceps, then you can use straps instead.
Personally, I like to use an alternating mixed grip for a few weeks of pulling, straps for the next few, and then back to mixed.
You can also include grip exercises in your routine at any point if you’re so inclined.
My favorite grip exercise is the plain ol’ barbell hold, which is exactly what it sounds like: holding onto a heavy barbell.
Here’s how to do and incorporate it into your program:
- Using a squat rack, place the bar at your knees and load it with a weight that you can hold for no more than 15-to-20 seconds.
- Do 3 sets of 15-to-20 second holds, resting for 3 minutes between each set.
- Do this once or twice per week at the end of your workouts, separated by 2-to-3 days.
Last but not least, you can also use chalk for an easy boost in your double overhand and mixed grip strength.
Weightlifting chalk helps by absorbing sweat and increasing the friction between your palm and the bar, and you can go with the liquid variety if you don’t want to make a mess or your gym doesn’t allow it.
FAQ #1: What’s the best grip for the deadlift?
There’s no “best” or “proper” grip for the deadlift—it depends on your goals, preferences, and circumstances.
If you’re new to deadlifting, the overhand grip is a great starting point because it’s simple and symmetrical. When the overhand grip deadlift becomes too tricky, switching to the mixed grip or hook grip deadlift is a sensible next step. Once grip becomes a limiting factor with these grips, you have two choices:
- Start using deadlifting straps.
- Improve your deadlift grip strength with specific grip training.
READ MORE: The Ultimate Guide on How to Work Your Forearms
FAQ #2: Hook grip vs. Mixed grip: Which is better?
It depends. The hook grip is more secure and safer for your biceps than the mixed grip, but many lifters find it uncomfortable and aren’t willing to endure the adjustment period it requires.
The only time learning the hook grip is “essential” is if you do Olympic weightlifting, since it’s the most practical way to hold the bar during clean, snatches, and so on.
The mixed grip, on the other hand, is simple to learn and works well for heavy deadlifts as long as you keep your arms straight. It also instantly boosts your deadlift grip strength without discomfort, so most people prefer it to the hook grip.
FAQ #3: Is the mixed grip deadlift bad?
No, it works well for most people. In fact, many elite powerlifters rely on the mixed grip for its simplicity and effectiveness. However, it does have risks. Specifically, it can cause muscle imbalances and may increase your risk of injury.
If you’re concerned, the simplest solution is to use a different deadlift grip discussed above.
FAQ #4: I can deadlift more but my grip can’t handle it. What should I do?
Here are four simple ways to improve your grip strength for the deadlift:
- Deadlift Regularly: The simplest and most effective way to improve your grip strength is to deadlift often. This doesn’t mean conventional deadlifting every session—mix in variations like Romanian deadlifts and rack pulls to keep your training fresh while building grip strength and avoiding burnout.
- Go Strap-Free on Other Exercises: Perform dumbbell leg exercises like Bulgarian split squats and lunges, and pulling movements like rows and pull-ups, without using straps. This forces your grip to get stronger while you train other muscles.
- Do Specific Grip Training: Include exercises that specifically target grip strength, such as barbell holds, plate pinches, dead hangs, and fat grip training
- Use Chalk: Deadlift chalk removes moisture from your hands, preventing sweat from compromising your grip. This makes it possible to train with heavier weights than you otherwise could, which is important for gaining grip strength.
Scientific References +
- Beggs, Luke Allen. COMPARISON of MUSCLE ACTIVATION and KINEMATICS during the DEADLIFT USING a DOUBLE‐PRONATED and OVERHAND/UNDERHAND GRIP. www.researchgate.net/publication/254692133_COMPARISON_OF_MUSCLE_ACTIVATION_AND_KINEMATICS_DURING_THE_DEADLIFT_USING_A_DOUBLE-PRONATED_AND_OVERHANDUNDERHAND_GRIP.
- K. Beckham, George, et al. “Isometric Strength of Powerlifters in Key Positions of the Conventional Deadlift.” Journal of Trainology, vol. 1, no. 2, 2012, pp. 32–35, https://doi.org/10.17338/trainology.1.2_32.
- Kompf, Justin, and Ognjen Arandjelović. “Understanding and Overcoming the Sticking Point in Resistance Exercise.” Sports Medicine, vol. 46, no. 6, 12 Jan. 2016, pp. 751–762, https://doi.org/10.1007/s40279-015-0460-2.
